Lens Correction in Capture One
Introduction to Capture One [Part 1]
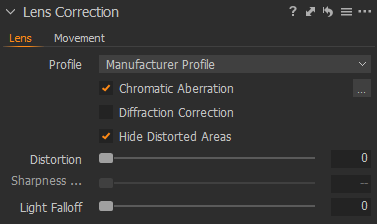
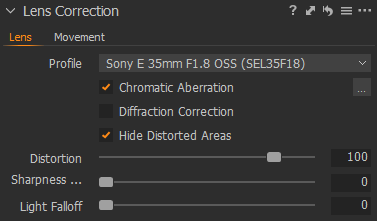
The Lens Menu

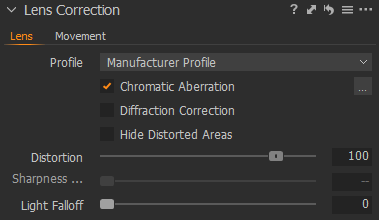
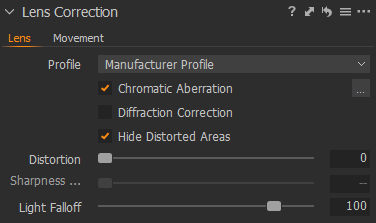
Lens Correction
Depending on your lens and camera you might get either one of the following profiles.
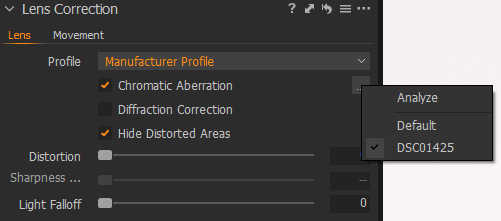
Manufacturer Profile: Manufacturers supply enough data in the RAW file to generate a profile.
Lens Specific Profile: Means Capture One has a profile of your lens with additional Sharpness Falloff correction.
General Note
It’s a good idea to set Capture One’s default sharpening to 0 while adjusting Chromatic Aberration, Purple Fringing, Diffraction Correction and Sharpness Falloff. (Detail > Sharpening > Amount: 0)

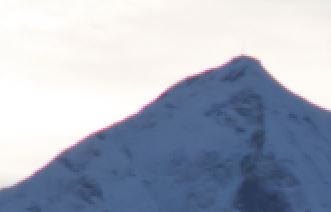
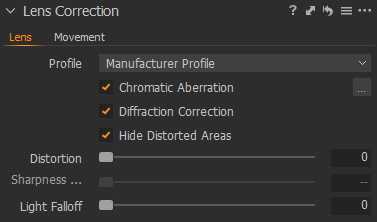
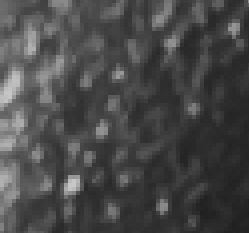
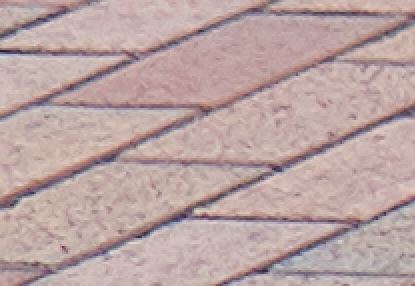
Chromatic Aberration
Chromatic Aberration is the failure of a lens to focus all colors to the same point. Which causes the beautiful rainbow effects you see below. CA Off vs On:
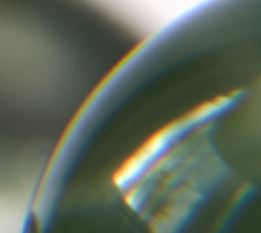
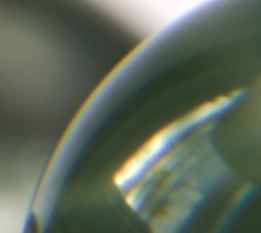
Analyze: No lens is ever the same as the reference profile so it’s always good to quickly run analyze if you notice any issue. In the case of the image above I used a macro ring which completely changed the lens characteristics and the correction improved only after analyzing.
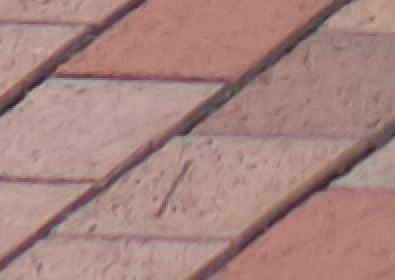
Purple Fringing

Usually visible in high contrast areas with chromatic aberration and / or lens flares. Purple fringing is not always purple, you might see cyan, blue or any other color. Defringe 0 vs 100:

Don’t just blindly set Chromatic Aberration and Defringe to 100. There is a correlation between these two and one might effect the other. Find the visually most pleasing result. Also preview it at 100% scale and you might not the accurate result at a scale less than 1:1.
Diffraction Correction
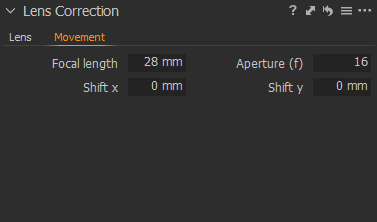
In order to have the Diffraction Correction working, make sure the the Movement parameters (Focal length and Aperture (f)) are set.
Diffraction is another optical physics effect that becomes more noticeable at smaller apertures. Light waves bend around corners, the smaller the aperture hole the more the effect amplifies. As a result the image will get blurrier.
Are you saying the lens is sharpest at the larger apertures? Unfortunately that is not the case because the center of the lens is the best corrected part. With a wide open aperture we get more light traveling through the edges, leading to a lose of sharpness again.
To find out at which aperture your lens is sharpest it’s good to test. Also keep in mind the sharpness falls off from the center. A good way to test is to put the camera on a tripod and shoot in manual mode with manual focus the same subject. The largest file is the sharpest. Remember that Capture One adds sharpening to the image by default, to get a better comparison you want to turn that off (Detail > Sharpening > Amount: 0)
Diffraction Off vs On at f/16:

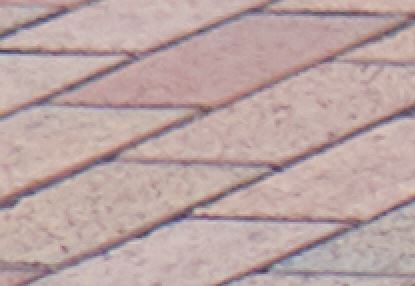
Distortion
This option as the name suggests will compensate for the Lens Distortion which is most visible on wide angle lenses and in extreme, as the name suggests, on fisheye lenses.
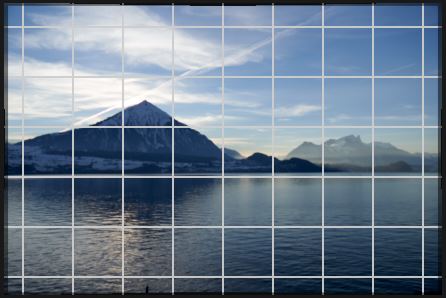
Hide Distorted Area
This will simply hide the leftover bent corners from the un-distortion. I tend to keep it off to make sure Capture One didn’t crop in more than needed. Below a screenshot with the distortion grid and the distorted area visible.
Sharpness Falloff
This option is only available if there’s a Capture One Profile for your lens.
To compensate for the sharpness falloff towards the edges, which is more or less depending on the lens. The center of the image doesn’t change or only very little.

Edge of the photo, Sharpness Falloff 0 vs 250:
Center of the photo, Sharpness Falloff 0 vs 250:
Light Falloff
To compensate the falloff from the center to the edges you can set this to 100. I wouldn’t go above 100 or the edges might get brighter than the center. If you decide to add vignetting anyway you might want to slide this back to 0.
Light Falloff 0 vs 100: